Callee Top Tutorial
Callee Top Pattern Tutorial
You guys! I am SO excited to bring you this Callee Top Pattern for FREE!
Since creating my business Instagram account I have been inspired like non other! Cooler temps changed to warm and my feed full of beanies and scarves changed to crop tops and bikinis! I saw SO many designs that I just loved, but quickly found that smaller cotton yarn with a little tiny hook was not always my favorite. I had used Bernat Home Dec yarn for a few small projects so decided to give it and my mind a try with something new! From there I designed the Callee Top.
What you will need:
Size 7.0mm hook
Bernat Home Dec yarn
Stitches used:
Ch: chain
dc: double crochet
Slip stitch
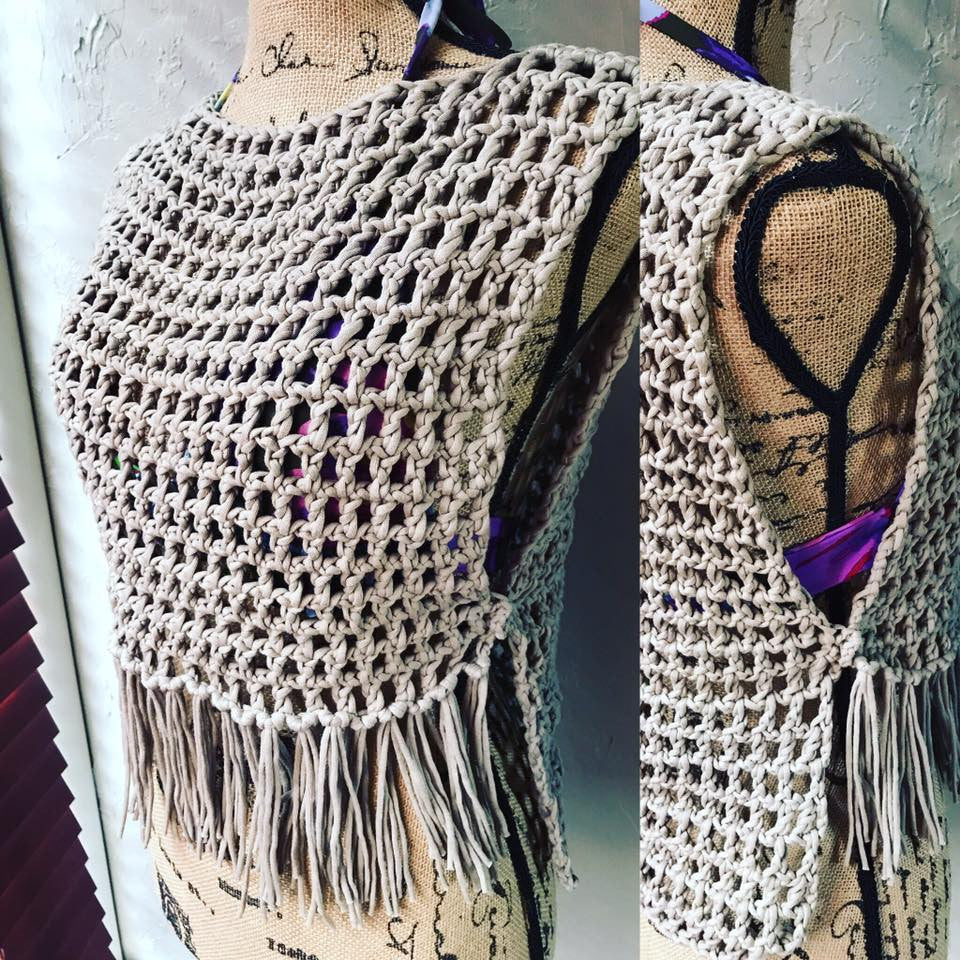
To begin your top you will need to measure from shoulder to shoulder. I made mine pretty broad so it even went past my shoulders some. You will then chain long enough to fit that measurement. (To fit size small adult I chained 53).
Row 1: dc in 3rd chain from hook, ch 1, skip 1 stitch, dc in the next stitch. You will repeat (dc,ch1, skip 1, dc) until the end of your chain. If your row ends with just one stitch left after you have completed this pattern then just simply dc in the last stitch. ch 2 turn.
Repeat Row 1 until you have the desired length of your top. The back panel follows the exact same instructions as the front. For my top I made it a high/low style with the front panel being a little shorter than the back.
To attach the two panels together I used a slip stitch. It will depend on how wide you want the neck to be as to how many slip stiches you make on each side. I made 7 on one then slip stitched around the back panel until there were 7 stitches left and then connected the last 7 on the other side. Mine has a wide neck that makes it less constricting and easy to slip over a swim suit.
The last step is to add fringe! (My fave)! You can either add fringe to just the front as I did or all the way around!! The choice is yours!! To add fringe I cut 3 pieces of yarn that were approximately 12 inches long. I then attached them in the space between dc by making a loop and pulling the end through to make a knot. I repeated this step until all the spaces were filled on the front panel of my top!

I hope you enjoy making your very own Callee Top!! Please tag me on Instagram and Facebook @thecrochetcabinet of any pictures of your top! I would LOVE to see what variations you all come up with!!
You do have permission to sell finished items of this tutorial I just ask that you please tag me in any listings or sales online! :-)


